All users granted Permission to create, edit and delete Tasks and Task Groups can take part in planning company activity using Task List, Task Tree and Calendar view. If your company workflow supposes that only managers may plan work for the staff, the staff should be denied the permission to create Tasks in Task Groups.
When you name a task, be specific but don't go into details you can describe in Notes (see below). You can change “Normal” priority, set by default, to the more suitable one: Lowest, Low, High, Highest or Urgent.
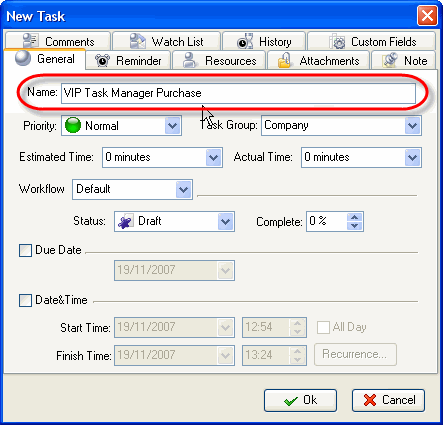
Enter Name of the Task
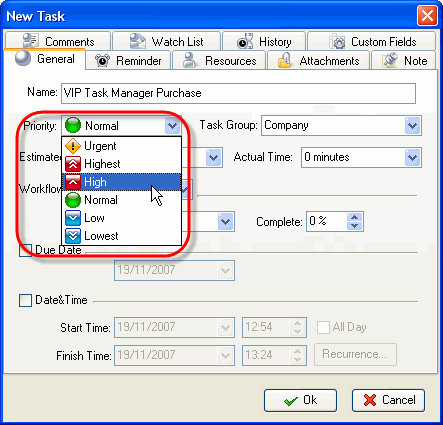
Select Priority of the Task
You should assign the task to a certain Task Group or sub-Group. When planning a task we recommend you to set Status 'Draft' which Notification mode is disabled so you can edit it without sending or getting Notifications.
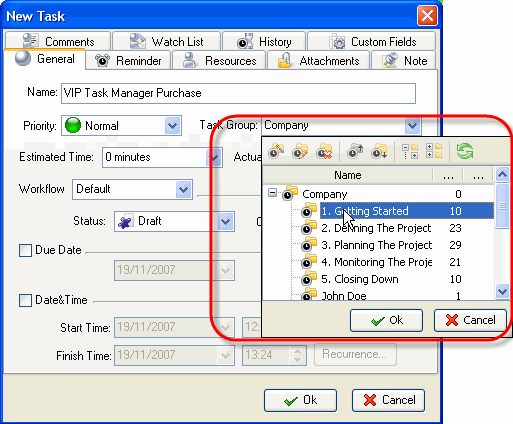
Double-click on Task Group
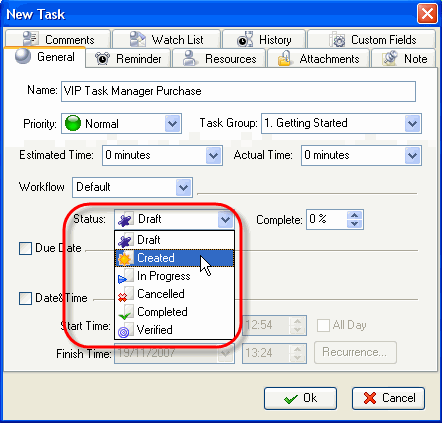
Select Status of the Task
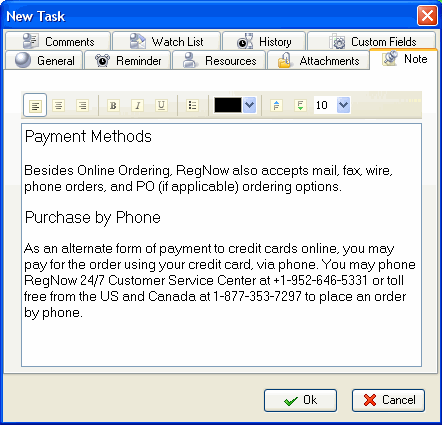
You can use RTF editor to support the task with related instructions or details that will be displayed in Notes panel at the bottom when the task is highlighted. Also you can format the text's font name, size, color, style, etc.
- Select Note tab
- Enter Text
- Format Text
- Click OK
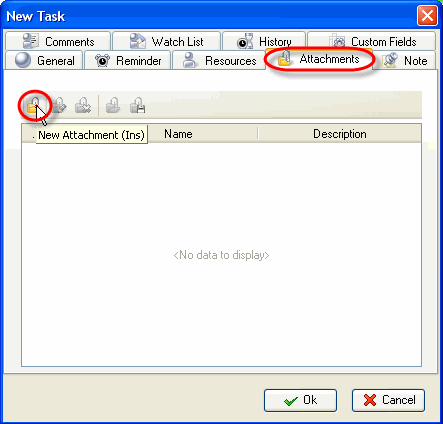
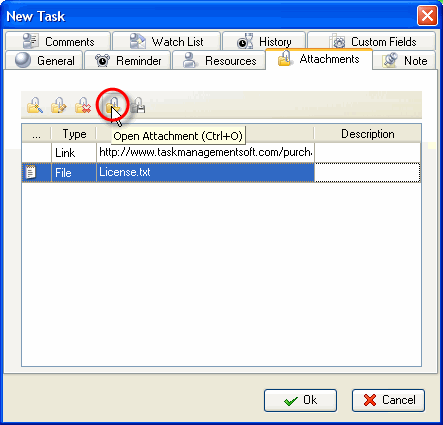
You can attach a Link or a File to the task. If you select Link, it will connect the task with a page in the Internet or a file stored at your PC or in a shared folder in the Local Network. If you select File, it will automatically upload a file to the database. The attachments will be displayed in Attachments panel at the bottom, when the task is highlighted.
- Select Attachments tab
- Enter Text
- Format Text
- Click on Add Attachment button
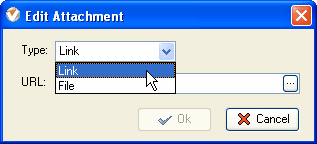
Select Link or File
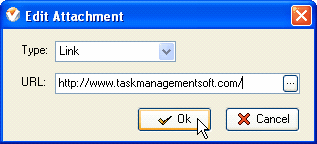
Enter hyperlink or file location, enter attachment description and click OK
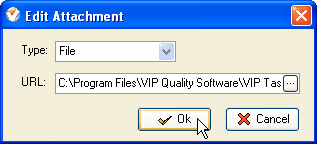
Select the path to file, enter attachment description and click OK
Users can easily open the files or Internet pages and save files from Database to their PC's or to shared folders of other PC's in the Local Network (saving is possible only after you have clicked on OK and saved the task).
Select a Link or File and click on Open Attachment
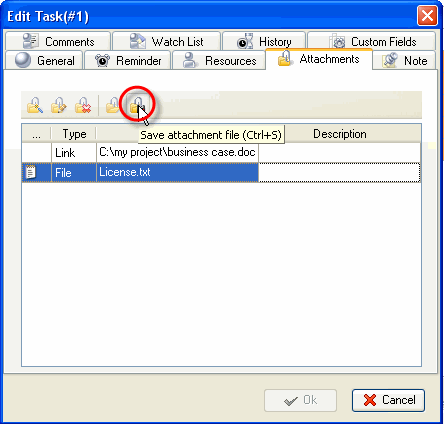
Select a Link or File and click on Save Attachment


 Play Demo
 Try It FREE